Pipe Furniture Plans for Industrial and Modern Designs

Pipe Furniture Plans: DIY Industrial & Modern Designs

Hey there, fellow DIY enthusiasts! Ever dreamt of crafting unique, industrial-chic furniture pieces that are both stylish and surprisingly easy to build? Well, you're in the right place! We're diving deep into the world of pipe furniture plans, showing you how to transform simple metal pipes and fittings into stunning pieces for your home. Forget expensive, mass-produced furniture – let's get hands-on and build something truly special.

Getting Started: Materials and Tools

Before we jump into specific plans, let's talk about the essentials. Building pipe furniture is surprisingly accessible, requiring relatively few tools and readily available materials.

Essential Materials:

  • Black iron pipe: This is your main structural component. You'll find various diameters and lengths available at most home improvement stores. Think about the overall size and weight capacity you need for your project.
  • Pipe fittings: These are the connectors – elbows, tees, flanges, caps, etc. – that hold everything together. Make sure you get the right fittings to match your pipe diameter.
  • Wood (optional): For tabletops, shelves, or seating surfaces. Hardwoods like oak or maple are durable, but plywood is a more budget-friendly option.
  • Thread sealant (Teflon tape): Absolutely crucial! This prevents leaks and ensures your joints are secure. Don't skimp on this!
  • Sandpaper (optional): For smoothing out any rough edges on the wood.
  • Wood stain or paint (optional): To customize the look of your wooden components.

Essential Tools:

  • Pipe cutter or hacksaw: For cutting the pipes to your desired lengths. A pipe cutter is cleaner and easier to use, but a hacksaw works in a pinch.
  • Pipe wrench: To tighten the fittings. This is probably your most important tool.
  • Adjustable wrench: Helpful for additional leverage and for working with smaller fittings.
  • Level: Essential for ensuring your furniture is, well, level!
  • Drill (optional): If you're using wood, you'll need a drill to pre-drill holes for screws or bolts, ensuring a clean and easy assembly.
  • Screwdriver or wrench (optional): Depending on the type of fasteners you use for your wood components.
Remember safety first! Always wear safety glasses when working with metal and power tools.

Simple Pipe Furniture Plans: Let's Build!

Now for the fun part: creating your own industrial masterpieces! We'll start with some simple projects perfect for beginners.

A Basic Industrial Side Table:

This is a fantastic starting project. You'll need four short pipe legs, four flange fittings, and a square or round tabletop. Attach the flanges to the legs, then attach the tabletop to the flanges using screws. It's that simple! You can customize the height and tabletop size to suit your needs.

A Modern Pipe Shelf:

Think sleek and minimalist. This project uses longer pipes to create horizontal shelves supported by vertical pipes attached to the wall. You'll need a few pipe lengths, wall flanges, and various connectors (tees and elbows might be useful for angles). This shelf is perfect for showcasing plants or books.

Rustic Pipe Coat Rack:

This is perfect for adding a touch of industrial charm to your entryway. You can create a simple, vertical design using several pipes and fittings. The pipes serve as hooks, giving you a sturdy and stylish place to hang coats and bags. Adding a wooden base would provide a more stable structure.

More Advanced Pipe Furniture Projects

Once you've mastered the basics, it's time to take on some more challenging, yet equally rewarding, projects.

A Stunning Industrial Coffee Table:

For a truly statement piece, consider building a coffee table with a larger, more intricate frame. This could involve using more pipes and fittings to create a unique, geometric base. Consider incorporating a glass or wood top for a luxurious touch. Planning this project carefully beforehand, sketching out your design, will be vital for success!

A Comfortable Pipe Chair:

This is a more ambitious undertaking, requiring careful planning and potentially some welding skills (depending on your design). You'll create a frame using pipes, and then add a comfortable seat and backrest. This could be upholstered fabric or even repurposed pallets. This project requires a strong grasp of structural principles, so plenty of research is recommended.

Pipe Bed Frame:

Now we're talking! A pipe bed frame is a real showstopper, offering a unique and industrial aesthetic. This project will necessitate carefully measuring your mattress size and creating a strong, stable frame to support it. You'll likely need a significant number of pipes and fittings, and perhaps some welding for added strength. This is not for the faint of heart, but the result is absolutely impressive!

Tips for Success

* Plan ahead: Sketch out your design and create a detailed materials list before you begin. * Measure twice, cut once: Accurate measurements are essential for a successful project. * Use plenty of Teflon tape: This prevents leaks and ensures strong joints. * Tighten fittings firmly: Loose fittings can lead to instability and potential leaks. * Don't be afraid to experiment: Pipe furniture is highly customizable.

Commonly Asked Questions

Q: Where can I buy black iron pipe and fittings? A: Most home improvement stores (like Home Depot, Lowe's, etc.) carry black iron pipe and fittings. You may also find them at plumbing supply stores. Q: How do I clean black iron pipe before assembly? A: A simple wipe-down with a cloth is usually sufficient. However, if the pipes are particularly dirty, you can use a wire brush to remove any rust or debris. Q: Can I use different types of pipe? A: While black iron pipe is the most common choice for its aesthetic appeal and durability, you could potentially use galvanized steel pipe, but be aware that the appearance may differ. Always make sure your fittings are compatible with your chosen pipe type. Q: What kind of wood is best for pipe furniture? A: Hardwoods like oak or maple are durable and visually appealing. However, plywood is a more budget-friendly option. Q: How can I finish my wooden components? A: You can stain, paint, or seal your wood to protect it and enhance its appearance. Q: What if I make a mistake? A: Don't worry! Mistakes happen. With pipe furniture, you can often disassemble and reassemble parts until you achieve the desired result. Remember to take your time, plan carefully, and enjoy the process. There you have it! Dive in, get creative, and enjoy the satisfaction of building your own unique, industrial-style pipe furniture. Happy crafting!
Share:

Furniture Business Plans for Starting Your Own Furniture Company

So You Want to Start a Furniture Business? Let's Talk Shop!

Okay, so you've got the vision: a thriving furniture business, maybe even your own brand name gracing beautiful, handcrafted pieces. That's awesome! Starting a furniture business isn't a walk in the park, but with a solid plan and a dash of grit, you can absolutely make it happen. Let's dive into the nitty-gritty of crafting a killer furniture business plan.

1. Defining Your Niche: What Kind of Furniture Are You Selling?

Before you even think about sourcing wood, you need to define your niche. Are you going for sleek, modern minimalist pieces? Rustic farmhouse charm? High-end luxury furniture? Or maybe something completely unique, like upcycled furniture with a vintage twist? Your niche will dictate everything from your target market to your pricing strategy and marketing efforts.

Finding Your Unique Selling Proposition (USP)

What makes your furniture different? Is it the materials you use? Your design aesthetic? Your commitment to sustainability? Your incredible customer service? Identifying your USP is crucial for standing out in a crowded market. Think about what sets you apart and emphasize that in your branding and marketing.

Target Audience: Who Are Your Ideal Customers?

Knowing your ideal customer is just as important as knowing your product. Are you targeting young professionals, families, luxury homeowners, or a specific demographic with unique needs? The more specific you can be, the better you can tailor your marketing and product development.

2. Sourcing and Production: Where Will Your Furniture Come From?

This is a big one. There are several ways to go about sourcing and producing your furniture:

  • Handmade by You (or a Team): If you're a skilled craftsperson, this offers complete control over quality and design. However, it's very labor-intensive and may limit your scale.
  • Outsourcing Production: You design the furniture and contract with a manufacturer or workshop to produce it. This can be more cost-effective and allow for larger-scale production, but requires careful quality control.
  • Wholesale: Buying ready-made furniture from wholesalers and reselling it. This is the quickest route to market, but your profit margins will be lower, and you'll have less control over design and quality.
  • Combination Approach: Many successful furniture businesses use a combination of these methods. Perhaps they handcraft some high-end pieces and outsource production for more affordable lines.

Material Selection: Quality Matters

The quality of your materials directly impacts the quality (and price) of your furniture. Choose materials that align with your brand and target market. Consider sustainability and ethical sourcing when making your choices. Will you use reclaimed wood? Locally sourced materials? Sustainable fabrics?

3. Marketing and Sales: Getting Your Furniture in Front of People

Even the most beautiful furniture won't sell itself. You need a solid marketing plan to reach your target audience. Consider these options:

  • E-commerce Website: Essential for reaching a wider audience. High-quality product photography and easy navigation are key.
  • Social Media Marketing: Instagram, Pinterest, and Facebook are excellent platforms for showcasing your furniture. Use high-quality images and videos to capture attention.
  • Local Partnerships: Collaborate with interior designers, home staging companies, or other businesses that complement your offerings.
  • Traditional Advertising: Consider print ads in local magazines or newspapers, or even radio advertising.
  • Pop-up Shops and Events: Great for building brand awareness and generating sales.

Pricing Strategy: Finding the Sweet Spot

Pricing your furniture correctly is crucial for profitability. Consider your production costs, desired profit margin, and competitor pricing. Don't undervalue your work!

4. Legal and Financial Aspects: The Business Side

Don't underestimate the importance of getting the legal and financial aspects of your business in order. You'll need to:

  • Choose a Business Structure: Sole proprietorship, partnership, LLC, etc. Each has different legal and tax implications.
  • Secure Funding: Do you need a loan? Will you self-fund? Explore your options and create a detailed financial plan.
  • Obtain Necessary Licenses and Permits: These vary by location, so check with your local authorities.
  • Insurance: Protect your business from potential risks with appropriate insurance coverage.

5. Operations and Logistics: Getting Your Furniture to Customers

Once you have orders, you need a system for fulfilling them. Consider:

  • Inventory Management: How will you track your inventory? Will you use software?
  • Shipping and Delivery: Will you handle shipping in-house, or outsource it to a third-party logistics provider?
  • Customer Service: Provide excellent customer service to build loyalty and positive word-of-mouth.

Commonly Asked Questions

Q: How much money do I need to start a furniture business?

A: This depends heavily on your chosen business model, scale, and production methods. You could start small with minimal upfront investment (e.g., upcycling and selling online) or require significant capital for large-scale production and retail space.

Q: What skills do I need?

A: Depending on your chosen model, you might need woodworking skills, design skills, business management skills, marketing skills, or a combination thereof. Don't be afraid to outsource tasks you're not skilled at.

Q: How do I find reliable manufacturers?

A: Research online, attend industry trade shows, and network with other businesses in the furniture industry. Always thoroughly vet potential manufacturers before entering into any agreements.

Q: What if my furniture doesn't sell?

A: Thorough market research and a well-defined marketing strategy are key to minimizing this risk. Be prepared to adapt your approach based on market feedback. Consider creating a Minimum Viable Product (MVP) to test the market before committing large resources.

Q: How long does it take to start a furniture business?

A: This varies depending on factors such as your business plan, funding, and production methods. It could take several months or even a year to get everything up and running.

Starting a furniture business is challenging but rewarding. With careful planning, hard work, and a passion for your craft, you can create a successful and fulfilling venture. Good luck!

Share:

Cheap Woodworking Projects for New DIY Enthusiasts

Affordable Woodworking Ventures for Aspiring Craftspeople

Embarking on the journey of woodworking can be both rewarding and intimidating. The initial investment in tools and materials can seem daunting, particularly for novices. However, crafting exquisite pieces doesn't necessitate a substantial financial outlay. This comprehensive guide elucidates a series of inexpensive woodworking projects ideally suited for burgeoning DIY enthusiasts, fostering both skill development and creative expression without straining the budget.

Fundamental Projects: Mastering the Basics

Before venturing into intricate designs, it's imperative to establish a solid foundation in fundamental woodworking techniques. These introductory projects utilize readily accessible materials and simple tools, allowing for focused learning and skill refinement.

The Humble Coasters: Refining Cutting and Sanding Techniques

This project serves as an excellent introduction to basic woodworking skills, encompassing precise cutting and meticulous sanding. Materials required are minimal: a small piece of inexpensive hardwood (such as pine or poplar), sandpaper (various grits), and a wood finish (optional). Tools needed include a hand saw or jigsaw, a measuring tape, and a sanding block. Begin by cutting the wood into uniform squares or circles. Precise measurements are crucial here, promoting accuracy and attention to detail. Subsequently, employ sandpaper to refine the edges and achieve a smooth, polished surface. Applying a wood finish, such as a varnish or stain, adds a layer of protection and aesthetic enhancement.

Simple Shelf Construction: Understanding Joining Methods

Constructing a small shelf is an ideal project for understanding basic joinery techniques, specifically butt joints. This project will introduce you to the use of wood glue and screws. Materials include two small pieces of wood for the shelf supports and one longer piece for the shelf itself. Select a wood type suitable for your aesthetic preferences and budget constraints. Tools needed comprise a drill, screwdriver, measuring tape, pencil, wood glue, and clamps. Accurate measurements are paramount in ensuring the shelf's stability and structural integrity. Pre-drilling holes prior to screwing prevents wood splitting, highlighting the importance of careful preparation.

Keychain Creation: Exploring Detail Work and Finishing

Crafting keychains introduces the nuances of intricate detail work and various finishing techniques. Materials include small scraps of wood, key rings, and potentially embellishments such as paint, varnish, or decorative inlay. Tools will be similar to the coaster project, primarily involving saws, sandpaper, and potentially small chisels for more detailed designs. This project encourages experimentation with different wood types, finishes, and decorative elements, fostering creative expression and a deeper understanding of material properties.

Intermediate Projects: Expanding Skillsets and Creativity

After gaining confidence with fundamental techniques, you can progress to projects incorporating more complex joinery and design elements. These intermediate projects demand increased precision and attention to detail but offer substantial rewards in terms of skill development and aesthetic appeal.

Birdhouse Construction: Utilizing More Advanced Joinery

Constructing a birdhouse involves the application of more advanced joinery techniques, including dadoes or rabbets for the roof and base. Materials primarily consist of readily available softwood, such as pine or cedar. Tools will likely include a saw (hand saw, jigsaw, or circular saw), a drill, sandpaper, and wood glue. Precise measurements and accurate cuts are paramount in constructing a functional and aesthetically pleasing birdhouse. Consideration should be given to the overall size and entry hole dimensions to suit specific bird species.

Picture Frames: Implementing Precision and Refinement

Creating picture frames allows for the honing of precision cutting and mitering techniques. Materials include wooden strips, commonly available in craft stores at affordable prices, and glass or plexiglass (optional). Tools needed include a miter saw (or hand saw with a miter box for increased accuracy), wood glue, clamps, and sandpaper. Precise angle cuts are vital to ensuring that the frame's corners join seamlessly. The choice of wood and finish greatly influences the frame's overall aesthetic, allowing for personalized expression.

Small Storage Boxes: Mastering Box Construction

Constructing small storage boxes or crates further refines your joinery skills, especially in box construction techniques like rabbet joints. Materials consist of relatively inexpensive wood, chosen based on desired aesthetic and strength requirements. Tools include a saw, drill, clamps, wood glue, sandpaper, and possibly a router for creating decorative edges. Proper planning and execution are crucial for ensuring the box's structural integrity and functionality. The size and design can be adjusted to meet individual storage needs.

Advanced Projects (Budget-Conscious Approaches): Pushing Boundaries

While more advanced projects might seem beyond a beginner's scope, careful planning and resourceful material sourcing can make them attainable. These projects involve more complex techniques and often larger pieces of wood, but the sense of accomplishment is significantly greater.

Repurposed Pallet Furniture: Sustainable and Economical

Repurposing old pallets offers a sustainable and inexpensive route to crafting unique furniture pieces. Materials are essentially free, obtained from construction sites or recycling centers (ensure pallets are treated appropriately for indoor use). Tools required will vary depending on the chosen project, but generally involve saws, hammers, nails, and possibly a sander and wood glue. Creativity is key in transforming reclaimed pallets into functional and aesthetically appealing furniture items.

Simple Workbench Construction: A Long-Term Investment

Building a simple workbench might seem ambitious, but constructing a basic model from readily available lumber can be surprisingly affordable. Materials include inexpensive lumber like pine or fir, which offer adequate strength for a beginner's workbench. Tools will require a more comprehensive collection, potentially including a circular saw, clamps, drill, and screws. Thorough planning, accurate measurements, and strong joinery are critical for building a sturdy and functional workbench that will serve for years.

Remember, success in woodworking is not solely about the cost of materials but about the dedication to learning, the patience to practice, and the creativity to craft unique and functional pieces. Start small, focus on mastering each technique, and gradually progress to more challenging projects. The journey of woodworking is an ongoing process of learning and growth, and even the simplest projects can yield immense satisfaction.

Share:

How to Woodworking Projects for Learning New Skills

Unlock Your Inner Craftsman: Woodworking Projects for Skill Building

So, you're itching to get into woodworking? That's awesome! It's a rewarding hobby that combines creativity, problem-solving, and the satisfaction of creating something tangible with your own two hands. But where do you even begin? It can feel overwhelming with all the tools, techniques, and project ideas out there. Don't worry, I've got you covered. This guide will walk you through some fantastic woodworking projects perfect for beginners, focusing on building essential skills along the way.

Starting Simple: Projects to Master the Basics

Before you jump into building a complex bookshelf, it's crucial to nail the fundamentals. These initial projects focus on building comfort with basic tools and techniques. Think of them as your woodworking boot camp!

1. The Humble Cutting Board: Mastering Straight Cuts

A cutting board is a fantastic first project. It lets you practice straight cuts with both a hand saw (if you're feeling brave!) and a miter saw (easier and more accurate for beginners). You'll learn about choosing the right wood (hardwoods like maple or walnut are great), safe saw usage, and sanding techniques to create a smooth, food-safe surface. Plus, everyone needs a cutting board!

Skills learned: Measuring, marking, straight cuts, sanding, finishing.

2. A Simple Shelf: Introducing Joining Techniques

Once you've mastered straight cuts, it's time to explore joining techniques. For a simple shelf, you can use pocket holes (a game changer for beginners!) or even simple butt joints reinforced with wood glue and screws. This project teaches you about measuring precisely, using different joinery methods, and attaching different pieces together securely.

Skills learned: Measuring accurately, drilling, pocket hole joinery (or butt joints), screwing, assembly.

3. A Wooden Box: Exploring More Advanced Joinery

Stepping up the challenge slightly, a wooden box introduces you to more intricate joinery like rabbet joints or miter joints. Rabbet joints create a neat, interlocking connection, while miter joints are visually appealing and require precise angle cuts. This project also helps you refine your sanding and finishing skills. Consider using contrasting wood types for an extra design element.

Skills learned: Precise measuring and cutting, rabbet/miter joints, finishing, advanced sanding techniques.

Intermediate Projects: Refining Your Craft

Once you've got the basics down, it's time to tackle some slightly more challenging projects. These will push your skills and introduce you to new techniques.

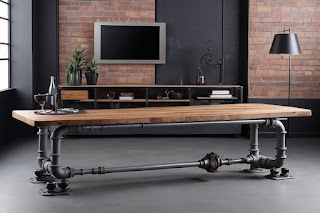
4. A Small Table: Exploring Legs and Frames

Building a small side table or coffee table is a significant step up. It requires planning the overall design, cutting various lengths of wood accurately, and assembling a frame. You'll learn about attaching legs, ensuring stability, and working with larger pieces of wood. You might even explore different leg styles or add a shelf for extra complexity.

Skills learned: Advanced measuring and cutting, creating frames, attaching legs, understanding structural integrity.

5. A Simple Stool: Mastering More Complex Joints

A stool is a fantastic project for practicing mortise and tenon joints, a classic woodworking joinery method. While it requires more precision and patience, the resulting joint is incredibly strong and aesthetically pleasing. This project will significantly improve your accuracy with hand tools or routers, depending on your approach.

Skills learned: Mortise and tenon joinery, using chisels (potentially), router skills (optional), precise measurements, creating a functional piece of furniture.

6. A Picture Frame: Precision and Detail Work

This might seem simple, but building a picture frame from scratch is a great way to hone your skills in precision cutting and miter joints. You can explore different frame styles, use contrasting wood types for a stylish look, and practice fine sanding and finishing techniques for a truly polished result. This will train your eye for detail and symmetry.

Skills learned: Precise miter cuts, fine sanding, finishing techniques, attention to detail, design considerations.

Advanced Projects: Taking Your Skills to the Next Level

Feeling confident? These projects will truly test your skills and allow you to express your creativity.

7. A Bookshelf: Planning, Design, and Functionality

Building a bookshelf involves comprehensive planning, accurately cutting numerous pieces, and assembling a complex structure. You'll need to consider load-bearing capacity, shelf spacing, and overall aesthetics. This project will significantly improve your organizational and problem-solving skills in addition to your woodworking technique.

Skills learned: Advanced planning, designing for functionality, complex assembly, understanding structural needs.

8. A Chair: A Masterpiece of Woodworking

A chair represents the pinnacle of woodworking skill for many. It requires precise joinery, a deep understanding of ergonomics, and a knack for design. This project involves numerous complex steps, such as shaping curved parts, creating comfortable seating, and ensuring stability. It's a huge undertaking but incredibly rewarding.

Skills learned: Advanced joinery techniques, shaping wood, understanding ergonomics, advanced design concepts, problem-solving at its finest.

Essential Tips for Success

  • Start small: Don't get overwhelmed. Begin with easy projects and gradually increase the complexity.
  • Practice safety: Always wear appropriate safety gear, including eye protection, hearing protection, and dust masks.
  • Invest in good tools: While you don't need the most expensive tools, quality tools will make a difference in your work.
  • Watch tutorials: There are tons of helpful videos online that can guide you through each step.
  • Be patient: Woodworking takes time and practice. Don't get discouraged if your first projects aren't perfect.
  • Have fun!: Enjoy the process of learning and creating. Woodworking is a journey, not a race.
  • Commonly Asked Questions

    Q: What kind of wood should I use for my first project?

    A: Pine is a good choice for beginners because it's relatively inexpensive, easy to work with, and readily available. However, hardwoods like maple or cherry will give a more polished finish. Ultimately, it depends on your budget and aesthetic goals.

    Q: What tools do I absolutely need to start?

    A: At a minimum, you'll need a measuring tape, a pencil, a hand saw or miter saw, sandpaper, wood glue, and clamps. As you progress, you might want to invest in a drill, chisels, and other specialized tools.

    Q: Where can I find woodworking plans?

    A: There are tons of free woodworking plans available online (search "free woodworking plans"), as well as many books and magazines dedicated to woodworking projects.

    Q: How do I finish my projects?

    A: Finishing protects your woodworking project from damage and enhances its appearance. Options include paint, varnish, stain, and oil. Research different finishes to find one suitable for your project and personal preference.

    Q: What if I make a mistake?

    A: Don't worry, everyone makes mistakes! Woodworking is a process of learning and refinement. Mistakes are opportunities to learn and improve your skills. Sometimes, you can even salvage a project with a bit of creativity and problem-solving.

    So there you have it! A comprehensive guide to jumpstarting your woodworking journey. Now get out there, grab some wood, and unleash your inner craftsman!

    Share:

    Furniture Plans to Build Stunning Home Pieces

    Furniture Plans to Build Stunning Home Pieces

    Hey there, fellow furniture enthusiasts! So you're thinking about building your own furniture? That's awesome! There's something incredibly satisfying about crafting something beautiful and functional with your own two hands. It's way more rewarding than just buying something off the shelf, and you get to customize it exactly how you want it. This guide is packed with ideas and tips to help you on your journey to building stunning pieces for your home. Let's dive in!

    Choosing Your First Project: Starting Small is Smart

    Picking your first project is crucial. Don't jump straight into a complex, multi-part masterpiece! Start with something relatively straightforward to build your confidence and get comfortable with the tools and techniques. Think simple, but stylish.

    Beginner-Friendly Furniture Plans:

    • Floating Shelves: These are a fantastic starting point. They're quick to build, require minimal tools, and are incredibly versatile. You can customize the size, number of shelves, and even add some unique finishing touches.
    • Simple Coffee Table: A basic square or rectangular coffee table is a great next step. You can use readily available materials like plywood or reclaimed wood for a rustic look. The construction is relatively simple, involving basic cuts and assembly.
    • Headboard: Depending on the design, a headboard can be a relatively easy project. A simple upholstered headboard or a rustic wood plank headboard are good options for beginners. You'll get practice with measuring, cutting, and potentially upholstery techniques.
    • Small Storage Bench: A small bench with storage underneath is another excellent choice. This project combines woodworking with basic joinery techniques, allowing you to hone your skills gradually.

    Remember, even these "simple" projects allow for personalization. You can choose different wood types, stains, or finishes to create something unique that perfectly matches your home's aesthetic.

    Essential Tools and Materials: Gathering Your Arsenal

    Before you start, you'll need the right tools. Don't worry, you don't need a full-blown workshop to get started. You can build a lot with a few key essentials:

    Essential Tools:

    • Measuring Tape: Accuracy is key in woodworking! Get a good quality tape measure.
    • Saw (Circular Saw or Hand Saw): A circular saw is easier for straight cuts, but a hand saw will work for smaller projects.
    • Drill and Drill Bits: For pilot holes and screwing in fasteners.
    • Screwdriver (Phillips and Flathead): Have both on hand for various types of screws.
    • Sandpaper (Various grits): For smoothing surfaces and creating a professional finish.
    • Safety Glasses and Dust Mask: Always prioritize safety!

    Material Considerations:

    The type of wood you choose will significantly impact the project's look, feel, and durability. Here are a few popular options:

    • Pine: Affordable, softwood, easy to work with, but can be more prone to dents.
    • Oak: Hardwood, durable, beautiful grain, but more expensive and harder to work with.
    • Plywood: Cost-effective, versatile, available in various thicknesses and finishes, great for flat surfaces.
    • Reclaimed Wood: Adds character and sustainability, but requires more preparation and care.

    Always check your plans for specific material requirements and quantities.

    Finding Reliable Furniture Plans: Where to Look

    The internet is a goldmine of free and paid furniture plans! However, make sure to choose reputable sources to avoid poorly designed or unsafe plans.

    Great Places to Find Plans:

    • Ana White: A hugely popular blog and website with tons of free plans, often with helpful videos and tutorials.
    • Pinterest: Search for specific furniture types, like "DIY coffee table plans," to find countless images and links to plans.
    • Etsy and other online marketplaces: While many are paid plans, you can often find high-quality, detailed plans from experienced woodworkers.
    • YouTube: Many woodworking YouTubers provide detailed tutorials and sometimes even plans as part of their videos.

    Finishing Touches: Taking Your Creation to the Next Level

    Once you've built your furniture piece, don't neglect the finishing touches! These details are what make the difference between a good piece and a truly stunning one.

    Finishing Options:

    • Sanding: Proper sanding is essential for a smooth, even surface. Use progressively finer grits of sandpaper to achieve a professional finish.
    • Staining: Stain adds color and enhances the wood grain. Choose a stain that complements your wood type and the overall style of your piece.
    • Painting: Painting offers versatility and allows you to create bold, colorful pieces. Use high-quality paint designed for furniture.
    • Sealing: Sealing protects your furniture from moisture, scratches, and everyday wear and tear. Polyurethane is a popular choice for its durability.

    Remember to follow the instructions on your chosen finish carefully for the best results.

    Commonly Asked Questions

    Q: What if I don't have a lot of woodworking experience?

    A: That's perfectly fine! Start with simple projects. There are plenty of easy-to-follow plans for beginners. Don't be afraid to ask for help or watch tutorial videos.

    Q: How much will it cost to build my own furniture?

    A: It depends on the project and the materials you choose. Often, building your own furniture is cheaper than buying it, especially if you source materials economically.

    Q: What kind of safety precautions should I take?

    A: Always wear safety glasses, a dust mask, and appropriate clothing. Use caution when operating power tools, and make sure your workspace is well-lit and organized.

    Q: What if I mess up?

    A: Don't worry, everyone makes mistakes! Woodworking is a learning process. Try to learn from your errors and keep practicing. Sometimes, a "mistake" can even add character to your piece!

    So there you have it! Get started on your woodworking journey and enjoy the process of creating beautiful, personalized furniture for your home. Happy building!

    Share:

    DIY Mexican Furniture Plans for Colorful and Handmade Creations

    DIY Mexican Furniture Plans for Colorful and Handmade Creations

    Mexican furniture, with its vibrant colors, intricate designs, and handcrafted charm, offers a unique and welcoming aesthetic to any home. While purchasing authentic pieces can be expensive, crafting your own allows for personalized expression and significant cost savings. This comprehensive guide provides detailed plans and considerations for creating your own colorful and handmade Mexican-inspired furniture, encouraging creativity and the satisfaction of building something beautiful and functional.

    Understanding the Mexican Furniture Aesthetic

    Before embarking on your DIY project, it's crucial to understand the key elements that define Mexican furniture style. This will inform your material choices, design decisions, and overall approach.

    Color Palette:

    Mexican furniture is renowned for its bold and vibrant color palette. Think rich terracotta reds, sunny yellows, deep blues, and lively greens. These colors are often used in combination, creating a lively and energetic atmosphere. Don't shy away from bright, saturated hues. Consider using contrasting colors for a truly striking effect. Natural wood tones, often left unpainted or subtly stained, also play an important role, providing a grounding element against the bolder colors.

    Materials:

    Traditional Mexican furniture often employs natural materials. Wood, especially pine and cedar, is prevalent, prized for its durability and ability to accept paint or stain. Wrought iron is another characteristic element, frequently used for legs, frames, and decorative accents. Handwoven textiles, such as brightly colored tapestries or serapes, can be incorporated as upholstery or decorative elements, adding a layer of texture and pattern.

    Design Elements:

    Mexican furniture design often incorporates intricate details and decorative elements. Think of carved wood details, colorful Talavera tile inlays, and hand-painted designs. Simple, clean lines are also common, particularly in rustic styles. The overall feel should be one of handcrafted warmth and inviting charm.

    Inspirational Styles:

    Researching different styles of Mexican furniture – from rustic ranchero pieces to more ornate colonial styles – will help you define your project's aesthetic direction. Browse online images, visit museums, and explore local antique shops for inspiration.

    DIY Project Ideas: Detailed Plans

    The following sections outline detailed plans for creating several popular pieces of Mexican-inspired furniture. These are starting points; feel free to adapt and modify them to suit your skills and preferences.

    1. A Colorful Bench:

    This project uses simple joinery techniques and allows for maximum creative expression through the paint and finishing choices.

    Materials:

    • Untreated pine lumber (2x4s and 2x6s)
    • Exterior-grade paint in vibrant colors
    • Wood screws
    • Sandpaper
    • Wood glue
    • Optional: decorative hardware

    Instructions:

    1. Cut the lumber to the desired dimensions for the bench seat and legs. Plan for a sturdy construction.
    2. Assemble the leg framework using wood glue and screws. Ensure the legs are square and stable.
    3. Attach the seat boards to the leg framework, again using glue and screws.
    4. Sand the entire bench to smooth out any rough edges.
    5. Apply multiple coats of exterior-grade paint in your chosen colors. Consider using stencils or freehand painting for decorative elements.
    6. Add any decorative hardware, such as decorative metal brackets.

    2. A Rustic Coffee Table:

    This project uses reclaimed wood for an authentic rustic look.

    Materials:

    • Reclaimed wood planks (varying widths and lengths for a rustic effect)
    • Wood stain or paint
    • Heavy-duty casters (for mobility)
    • Wood glue
    • Wood screws
    • Sandpaper

    Instructions:

    1. Select reclaimed wood planks with interesting textures and variations in color and grain.
    2. Clean and sand the wood planks to prepare them for finishing.
    3. Assemble the tabletop by joining the planks together using wood glue and screws. Ensure the planks are tightly joined and the surface is level.
    4. Apply wood stain or paint to enhance the rustic look. Distress the wood for a more weathered appearance.
    5. Attach heavy-duty casters to the underside of the tabletop for easy mobility.

    3. A Hand-Painted Headboard:

    This project involves creating a personalized headboard that adds a vibrant splash of color to your bedroom.

    Materials:

    • Plywood (cut to the desired size and thickness)
    • Acrylic paints in bright colors
    • Paintbrushes
    • Stencil (optional)
    • Sealer (to protect the paint)

    Instructions:

    1. Prepare the plywood by sanding it smooth.
    2. Sketch your design onto the plywood. Consider using traditional Mexican motifs or creating your own unique design.
    3. Paint the design using acrylic paints. Use multiple coats for vibrant color saturation.
    4. Apply a sealer to protect the paint and prevent fading.
    5. Attach the headboard to the bed frame.

    Essential Tools and Techniques

    Successful DIY furniture projects require the right tools and techniques. Investing in quality tools will make the process smoother and yield better results.

    Essential Tools:

    • Measuring tape
    • Saw (circular saw, miter saw, or hand saw)
    • Drill and drill bits
    • Screwdriver
    • Sandpaper (various grits)
    • Clamps
    • Safety glasses and dust mask

    Essential Techniques:

    • Accurate Measuring and Cutting: Precise measurements are crucial for ensuring that your project comes together correctly. Use a measuring tape and a sharp saw for clean cuts.
    • Proper Joiners: Learn basic woodworking joinery techniques such as butt joints, dado joints, or mortise and tenon joints for strong and lasting furniture.
    • Finishing Techniques: Explore different finishing options, such as painting, staining, and sealing, to achieve the desired aesthetic.

    Remember to prioritize safety throughout the entire process. Always wear appropriate safety gear, work in a well-ventilated area, and follow all safety instructions provided with your tools.

    Creating your own Mexican-inspired furniture is a rewarding experience that combines creativity, craftsmanship, and the joy of bringing a unique piece into your home. By following these plans and adapting them to your own style, you can build beautiful and functional pieces that reflect your personal taste and add a vibrant touch of Mexican charm to your living space.

    Share:

    Build Custom Outdoor Furniture with Expert Woodworking Plans

    Build Custom Outdoor Furniture with Expert Woodworking Plans

    Tired of mass-produced outdoor furniture that lacks character and durability? Yearning for a unique patio set that reflects your personal style and will withstand the elements for years to come? Then embrace the rewarding challenge of building your own custom outdoor furniture! With detailed woodworking plans and a little elbow grease, you can craft stunning pieces that will be the envy of your neighbors and the heart of your outdoor oasis. This article provides a comprehensive guide to embarking on this exciting project.

    Choosing Your Project and Plans

    The first step is selecting the perfect outdoor furniture project. Consider your available space, desired style, and skill level. A simple bench offers a great entry point for beginners, while a complex pergola demands more advanced woodworking skills. Once you've decided on a design, finding detailed, professional woodworking plans is crucial. Don't settle for ambiguous instructions; look for plans that include clear diagrams, precise measurements, cut lists, and material specifications. Reputable online sources and woodworking magazines often offer such plans, or you can even commission custom plans from a professional designer to perfectly match your vision. Thoroughly review the plans before purchasing to ensure they align with your capabilities and resources.

    Essential Considerations Before You Start:

    • Wood Selection: Opt for durable, weather-resistant woods like cedar, redwood, or teak. Pressure-treated lumber is a budget-friendly alternative, but requires proper sealing for longevity.
    • Hardware: Choose high-quality, exterior-grade screws, bolts, and fasteners designed to withstand moisture and temperature fluctuations.
    • Finishes: Protect your investment with a durable outdoor-grade finish. Consider stains, paints, or sealants that offer UV protection and water resistance. Apply multiple coats for optimal protection.

    Gathering Tools and Materials

    Before you begin cutting, assemble all necessary tools and materials. A comprehensive toolkit is essential for a successful project. This includes a circular saw, a miter saw (for precise angle cuts), a drill, a sander, clamps, measuring tape, a square, and safety glasses. Always prioritize safety by wearing appropriate protective gear. Accurately measure and cut your lumber according to the detailed plans, ensuring precise dimensions for proper assembly. Pre-drilling pilot holes before driving screws helps prevent wood splitting and ensures a cleaner finish. Keep your workspace organized and clean to maintain efficiency and prevent accidents.

    Assembly and Finishing Touches

    With your cuts meticulously made, carefully follow the woodworking plans for assembly. Take your time, ensuring each joint is secure and aligned. Clamps are invaluable during assembly, holding pieces firmly in place until the adhesive sets or screws are tightened. Once assembled, thoroughly sand all surfaces to achieve a smooth finish. Pay attention to detail, sanding out any imperfections or rough edges. Then, apply your chosen finish following the manufacturer's instructions. Allow ample drying time between coats to ensure optimal protection and durability. Finally, admire your handiwork – a piece of custom-built outdoor furniture that will bring years of enjoyment.

    Beyond the Basics: Adding Personal Touches

    Personalize your creations! Once you've mastered the basics, experiment with different designs, woods, and finishes. Incorporate decorative elements like carved details, inlays, or custom hardware. Consider adding comfortable cushions or weather-resistant fabrics to enhance comfort. Let your creativity flourish and transform your outdoor space into a unique reflection of your personality. The possibilities are endless!

    Share:

    Search This Blog

    Powered by Blogger.

    Blog Archive

    Labels

    Recent Posts